Prices setup
You can set up all your prices from the Clients details page.
We suggest you create a specific template client for each set of prices you want to use. Then, you can easily copy the prices just by one click onto new clients, or you can set a default client whose prices will be used with every new client.
You can see how to create new clients accounts here.
Bear in mind that you must have all your services and zones already created, since you will be setting up prices according to these two variables (most of the time).
- Creating a price scale from scratch
As you can see, in my default example company, I have created a new client named Default prices client.
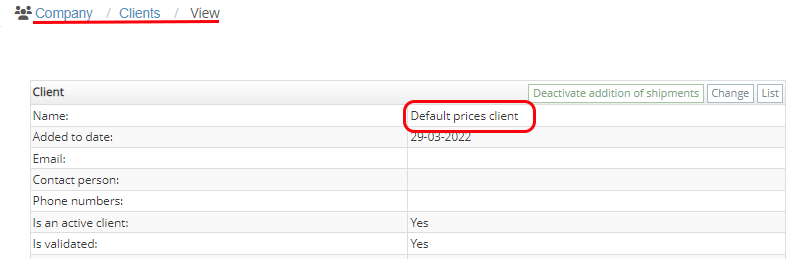
In that specific client page, scroll all the way down until you see some tables similar to the ones below:
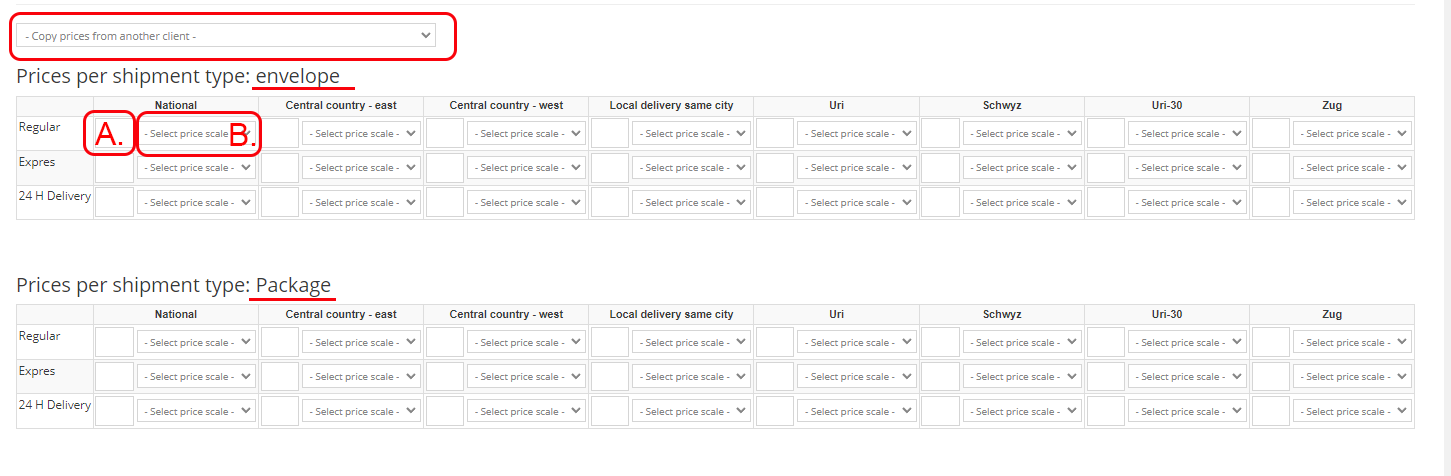
If you already have a set of prices set up on a client, you can always copy them directly from that client using the Copy prices from another client box above the tables.
- Filling in the price table
If you are creating your prices now, here a few things to keep in mind:
- There are 2 types of shipments: envelope and package. If you also need pallets, you can just add them as a main service and this way have separate prices for them. For each type of shipment you will get a table where you can fill in the prices for each type of service and zone, respectively.
- Each row is a type of main service you have previously created. In our case, I have regular, express and 24h delivery.
- Each column represents a zone you have created. If you have a lot of zones, you will have many columns and checking out a print-out of the Price zone graph you have already created might help. You can always find it Routing>Zones and then scroll down to see Price zone graph.
- You have two options in setting the price: A. writing a fixed sum for your specific service in that specific zone, or B. selecting a price scale for it, that you have already created. I will show you how to create a price scale below.
- There are a lot of other settings related to prices right under these price tables, and I will go through them afterwards.
B. Creating a price scale
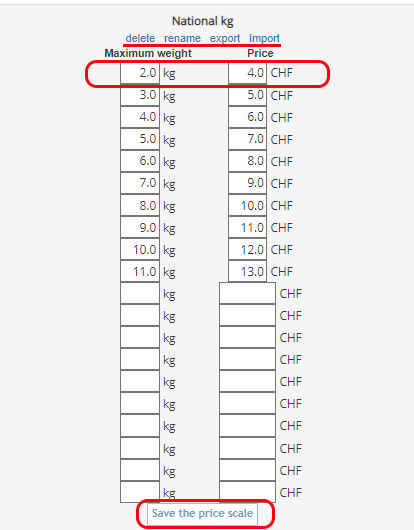
Scroll all the way down into the page and on the bottom left, write the desired name of your scale, and click on the Add price scale button.
Fill in the weight on the left and the price on the right for each step.
In my case, I chose to increase the price for each kilogram by 1 Swiss Franc (CHF). The first weight I put in is 2 kg, meaning that all the expeditions that are up to 2 kg will cost 4 CHF, the sum belonging to 2 kg in the chart.
Once you have reached the end of the rows in your price scale, but you want to add more, just Save the price scale, and another 10 rows will appear.
Now you can go to the tables above, containing the services and the zones, and you can select this price scale in any combination you desire.
Of course, you can always delete, rename, export or import your price scales, which might make your process faster, especially if you have many price scales.
C. Other price settings
Between the Prices per shipment type tables and the price scales, there is a big table called Other prices per zone.
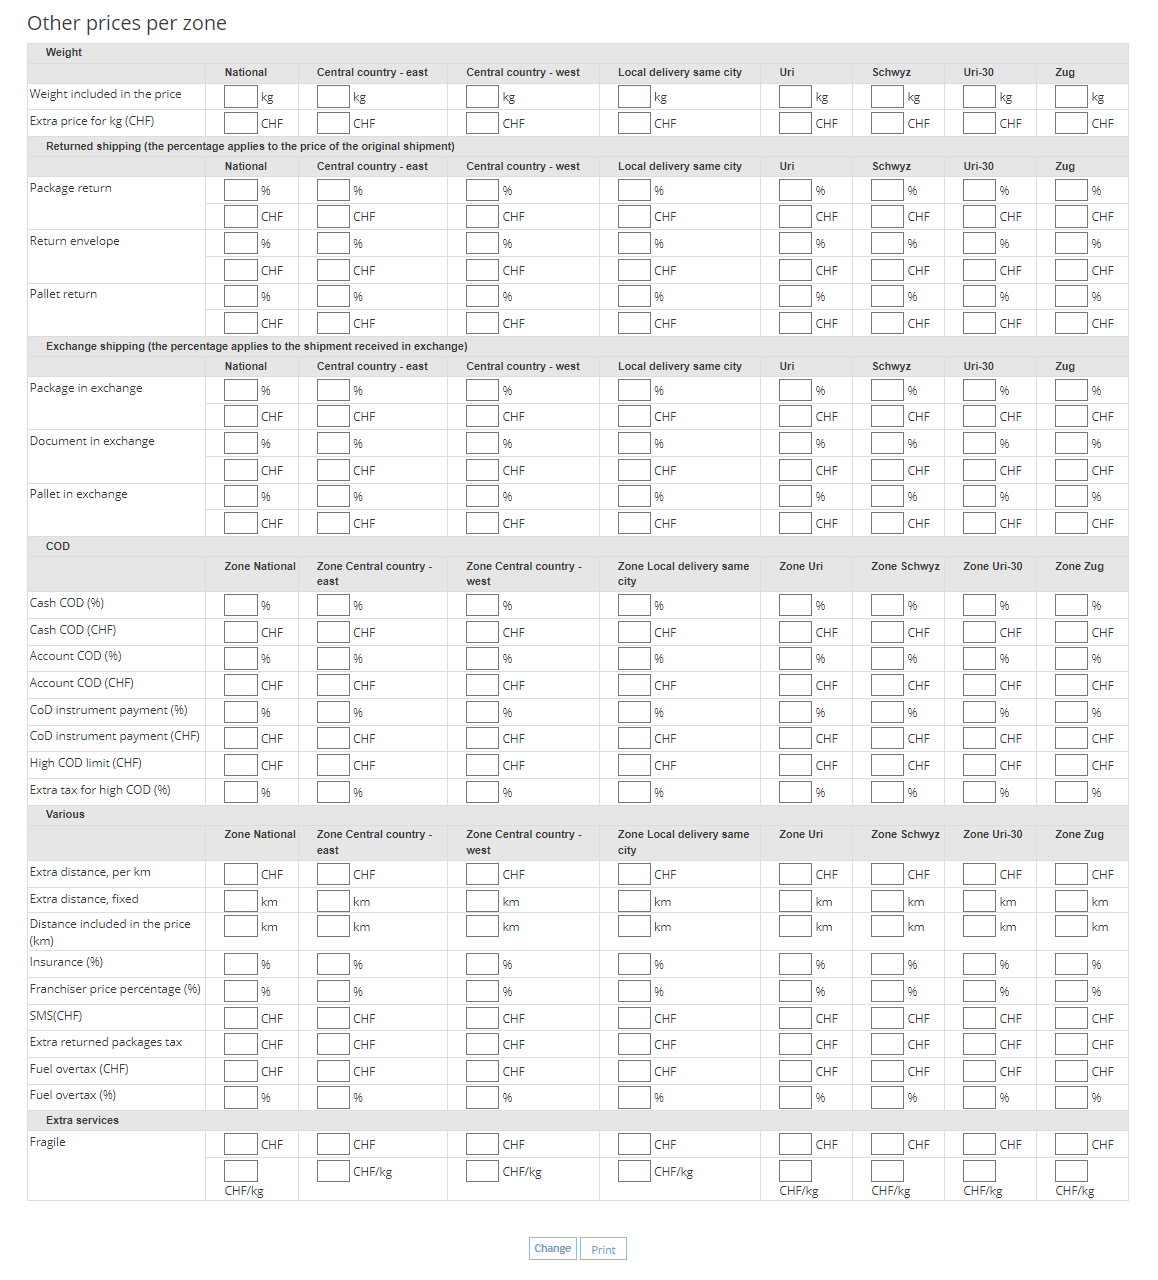
Here you can mostly add extra charges for the services you provide.
First, you can add a base weight and an extra price for each weight unit a shipment has. This basically creates a scale in itself, and it works very well if you wrote a base price for your service/zone.
For the rest of the options in this table, you can add extra charges (both per weight and by percent) to returned packages, exchanged shipments - those picked up upon delivery, or to CoD (cash on delivery). You can also add charges for extra distance, insurance, a specific percentage if the shipment is handles by a franchiser, for sending short messages to clients or a fuel overtax.
If you created extra services as well, here is where you can set up the prices for each of them.
All these settings can be set for each zone separately.
When you are done, don’t forget to save by clicking on Change.
2. General settings regarding pricing
In Settings>Settings>Settings, under the Billing category, you will find a box called Mix scale with kg price. If you tick it, it allows you to use both types of price configuration.

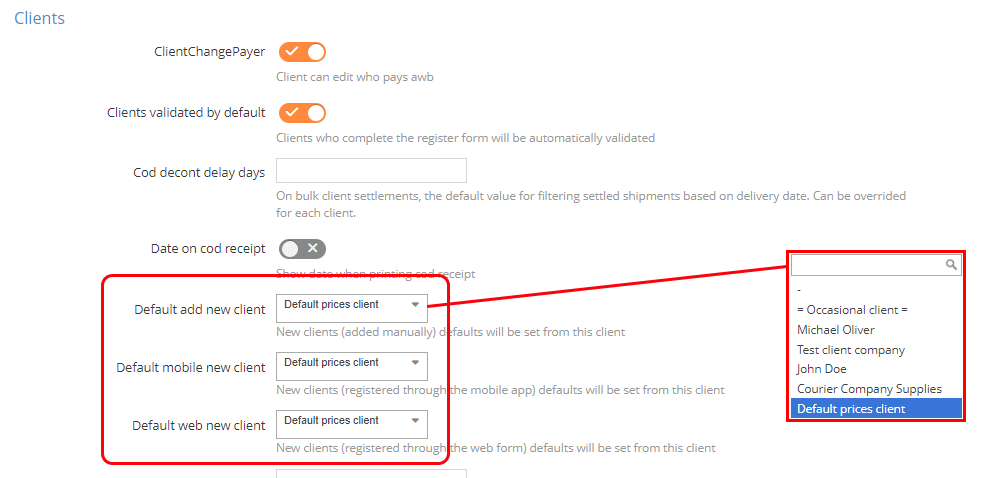
In Settings>Settings>Settings, under the Clients category, you can choose a specific client account, which all new created clients will take their prices from. You can select separately for clients depending on how their accounts were created (added manually by someone in the app, registered through the web form or through the client mobile app)
In my case, I just picked the Default prices client that I just created, since I want to use its prices for all of my clients.
You can always create other template clients for special prices (like VIP clients, those that have high volumes, etc.) and just copy them when needed to the clients of your choice.