Managing your list of cities and provinces - the Cities menu
There are several layers to using a list of cities for your pricing/routing, and you can define that in Settings>Settings>Settings>Cities/Regions
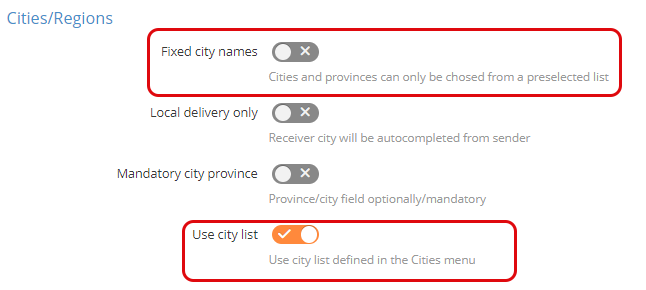
Use city list means you will have to upload a list of cities to your account, and it will be used to define your zones. You can do that from the Cities menu (as seen below), or you can do that when you create zones
For a few countries, there is already a predefined database with cities and postal codes, which is used if the Use city list is not checked.
If you choose Fixed city names, your clients will be able to choose locations from a preselected list. You might want to check this option if you know there are various ways of spelling names in your list, and if you want to make sure you always have the correct name of the city on your addresses.
In order to add your entire city list, go to Routing>Cities
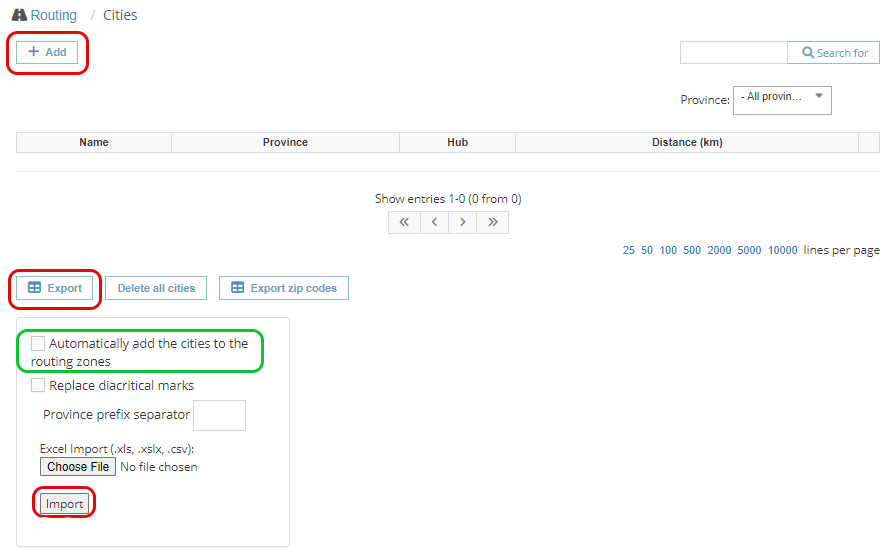
You can always add a new city manually if you wish to (+Add), but we suggest you use the Import option. For that, you have to download a template file, using Export. After you have filled it in, Choose File, and Import.
If you already have a plan of zones and hubs, you can import a more complex Excel file, where you can add the names of the hubs as well and that also allows you to add the cities to the routing zones. If that is the case, please contact us directly here.
Replace diacritical marks means that if your excel contains words with letters that have extra signs on them - like accents, dots, strokes, etc. -, they can be replaced by the simple version of the letter, if you wish to. For example, ä, à and ă would all become the letter a.
When adding a city (both manually or in an Excel file), you will have to fill in the name of the city, its province and, as an option, any extra distance you want to invoice for that route (if that is the case).