Creating my first shipment
This article shows you how to create a shipment directly from our software, on the web interface. If you want to know more about other methods of creating a shipment, check out Basic Tutorial - Introduction.
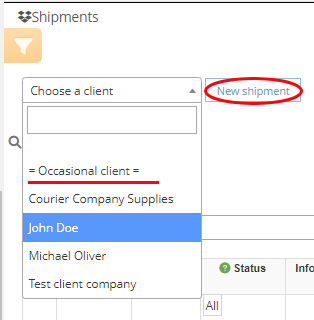
Go to the Shipments menu, select the client who is placing the order, click on New shipment button and fill the data about the expedition.
You need to have the client already in the software. If this is too much trouble, the software comes with a handy "Occasional client" already created, which you can use for one-shot shipments, for which you don't want to keep the client.
After that, the fill-in page of the shipments shows up.
If the sender is already in your client list, its information box is minimized. You can always click on the edit button on it and make changes there.
Both sender and recipient addresses can be saved for later, or loaded from an address database. You (and your clients) can upload those addresses directly from an Excel file by going to Shipments>Addresses. The one single text Address field will be used for these imported addresses.
Make sure the paying client is chosen correctly and that you add weight to your package(s) (by default, the paying client is the client you chose right above it).
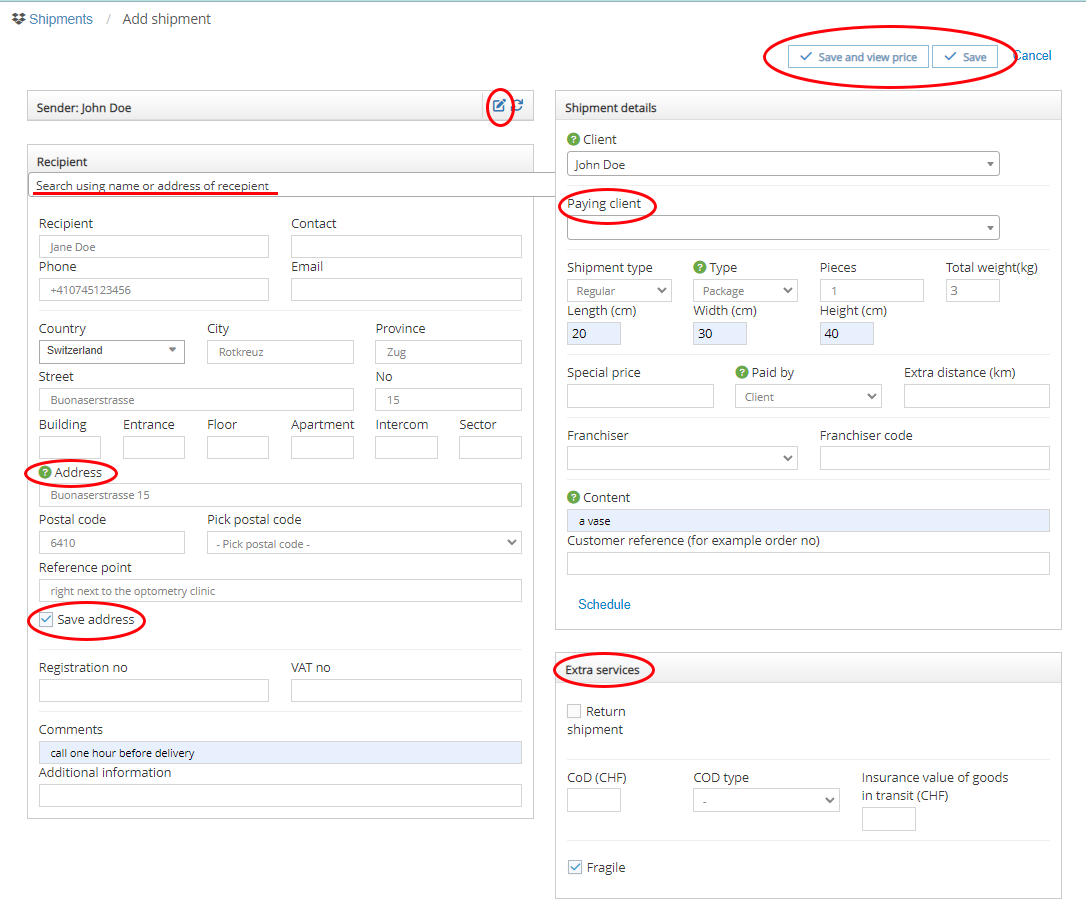
If you click on Save and view price, the same page will appear, but the price will be written at the top of the page.
If you click on Save, you will be taken to the Shipment page.
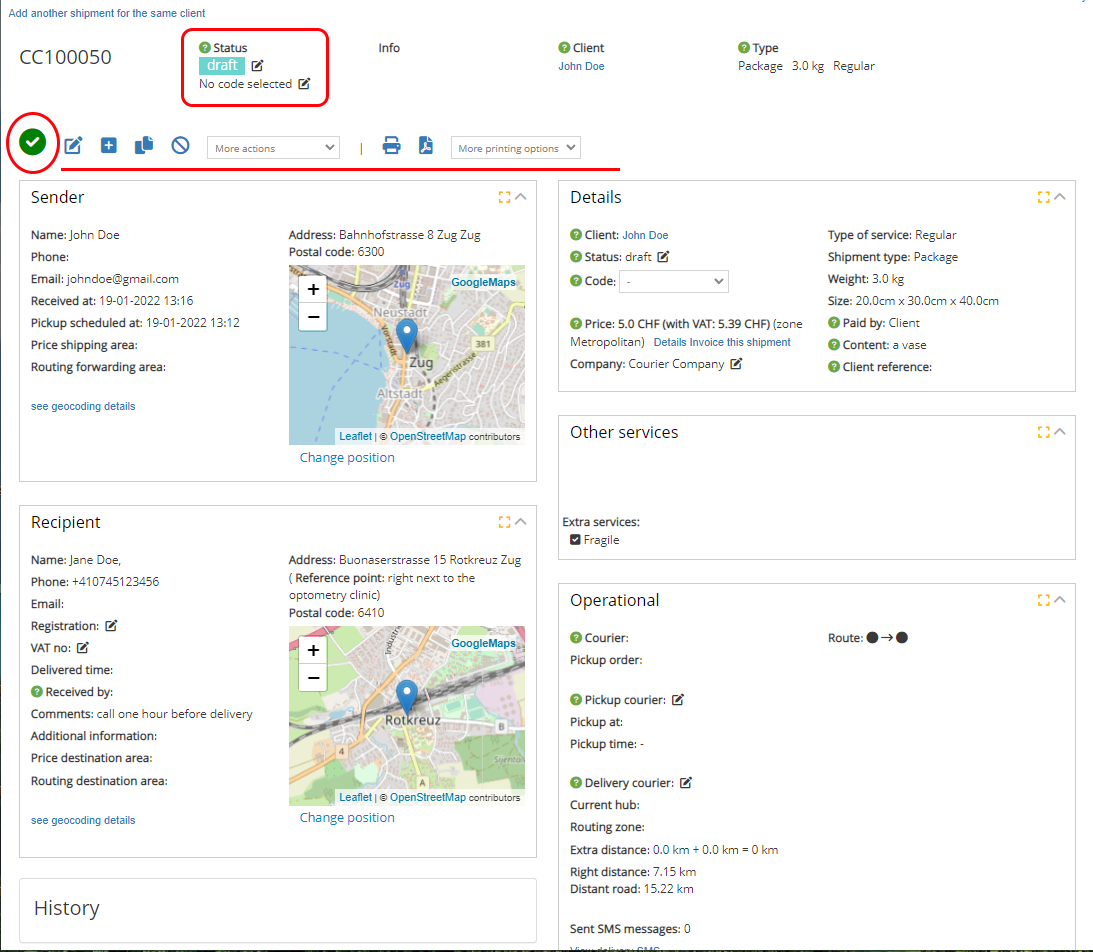
Here, you can have an overview of the whole shipment, at all times.
Shipments are created with the “draft” status by default. The status has to be changed in order to do anything useful with it. Usually you want to change it to "uncollected", which will then be automatically changed to "active" when a courier scans it at pickup.
If you do the same operation logged in as a client, you won’t be able to change the status directly - but you can "Finalize" them, which does the same thing - click on the green tick bubble at the beginning of the "actions" row. Make sure your clients know they have to do this - draft expeditions aren’t considered ready to be picked up.
Besides the status, you can always add codes, which are like sub-statuses that can give additional information on the package. You can always add codes from Settings>Codes, and attribute each code to your desired status. For example, you can define codes that apply to the "returned" status, and explain why the shipment was returned: "Recipient address incorrect", "Recipient refused delivery" and so on.
If you set a number of pieces/packages over 1, on finalization, the software will automatically turn this shipment into a group by creating the other necessary shipments. A group is invoiced as one shipment of the total weight, but allows you to process each piece independently on the operational side. Since they have separate tracking numbers, you can load them up in different cars, assign them to separate couriers and so on. The software warns you if you fail to properly reassemble them for delivery.
Going back to the list page, you can assign the shipment to a courier and generate a rollcart (more about it here). If the assigned courier has the Android application installed, he will receive a notification that he has new shipments assigned.