Creating accounts for couriers
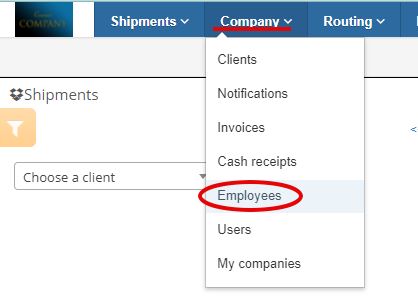
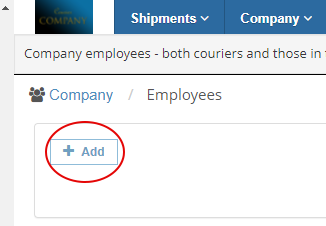
You can create accounts for couriers or back office workers from Company/Employees, then Add, where you can fill the name and information of each employee.


A username will be automatically created for each employee. Fill in as much information as you need. Be careful, some fields hold great importance for a further smooth function of the application, such as ticking Delivery Courier or In warehouse only, since the mobile app could behave differently for each of them. Many fields have contextual help; just hover your mouse over the green question mark and you will get an explanation of what the specific field means. Here, you can see the explanation for In warehouse only.

Phone IMEI (International Mobile Equipment Identity) is a unique identification serial number that all mobile phones and smartphones have. It is normally 15 digits long.
When Only in active state is checked, the user of the mobile app will not have to do Loading and Finishing the day (see more info on it in the Mobile app user guide, chapter 3). It is suggested for warehouse/hub workers to have this option checked.
Home coordinates and He's coming home are alternative coordinates for starting/ending the route. There are certain routing options that may take that into account.
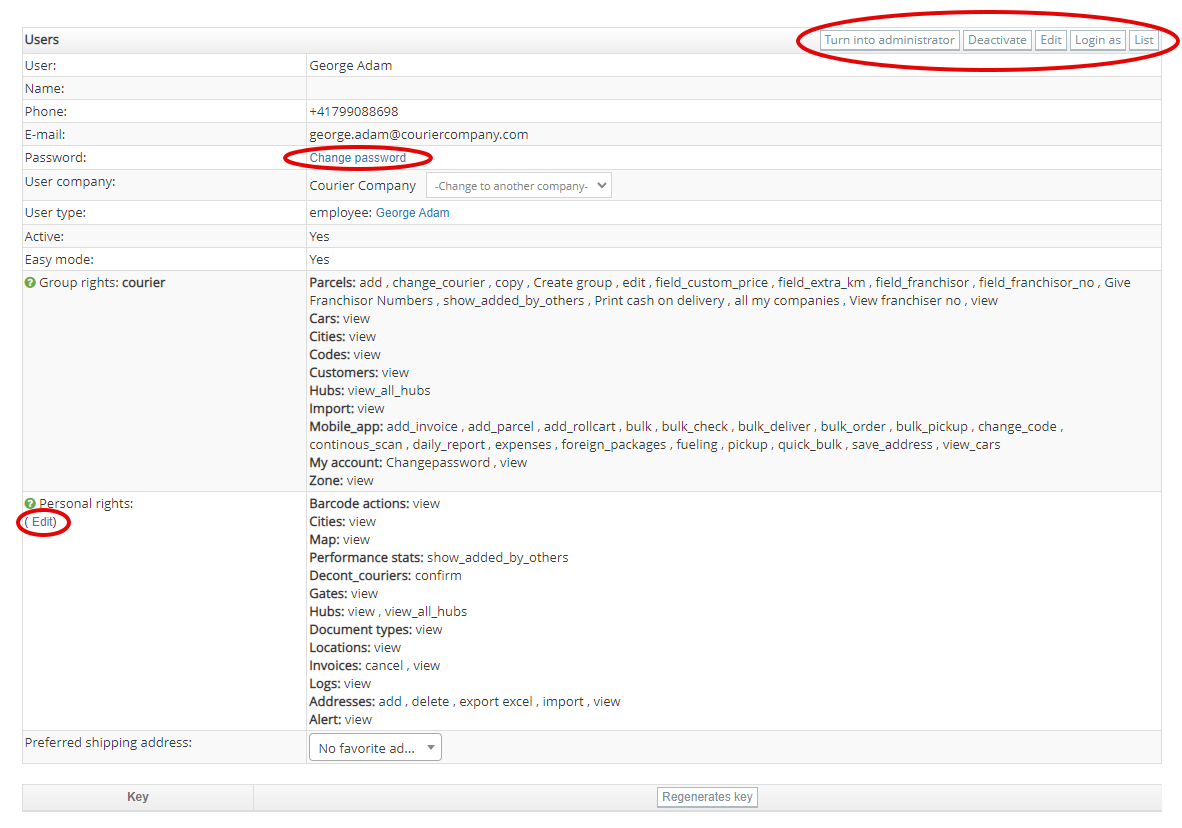
At the end click OK and your employee account is created. You will now see a table with all the information you have already filled in previously. The employee will not receive an email with the username and password, so make sure you give it to them personally. You can always change the password by clicking "click here" next to the username, as seen below.

In the top right corner of the table, the three buttons there give you the following choices:
- Deactivate allows you to deactivate the account, meaning its user will not be able to use it in the desktop or mobile app.
- Edit lets you edit all the fields and check-in boxes you have previously filled in when making the employee account. You can also do that by clicking the green pencil icon in the List of employees, at the end of the row.
- List takes you to the list of all your employees in the app. Attention! When that happens, you may not be able to see the deactivated users in the list. In order to do that, make sure to uncheck the "Active employees only" above the list.

You can always access the employee information table by clicking the user's Name (underlined with red) or the magnifying glass icon at the end of the row.
By clicking the username (circled with green), the app takes you to the menu where you can change the password, and also change the user's rights.

In order to change the password, click "change password". A pop-up will show up, where you can write the new password.
On the top right of the above table, there are several buttons you might find useful.
- Turn into administrator does exactly this, and it gives more rights to the user. An administrator has all the options and rights open in the application.
- Deactivate does the same as the button with the same name we described previously, the user cannot use the desktop or the mobile app anymore.
- Edit lets you change a few things, like name, phone number, email address, whether the employee uses the Easymode or not and what rights group it belongs to (client, courier or dispatch).
- Login as allows you to login into the application with this exact user and check out what they can see or do.
- List takes to the list of all the users you have in the application, clients included.
An employee had two types of rights when using the application: group rights and personal rights.
Group rights are set by the group you included the user into and can be changed by clicking on the Edit button as seen in the above image.
By clicking (Edit) in the Personal rights field, you can change manually the rights of the user. The list is very long, but the most used rights are already checked for each type of group already, you can check out this menu if you want to change something very specific to that user.
The last line, Key, allows you to regenerate an API key, if your user has one attached to him/her.
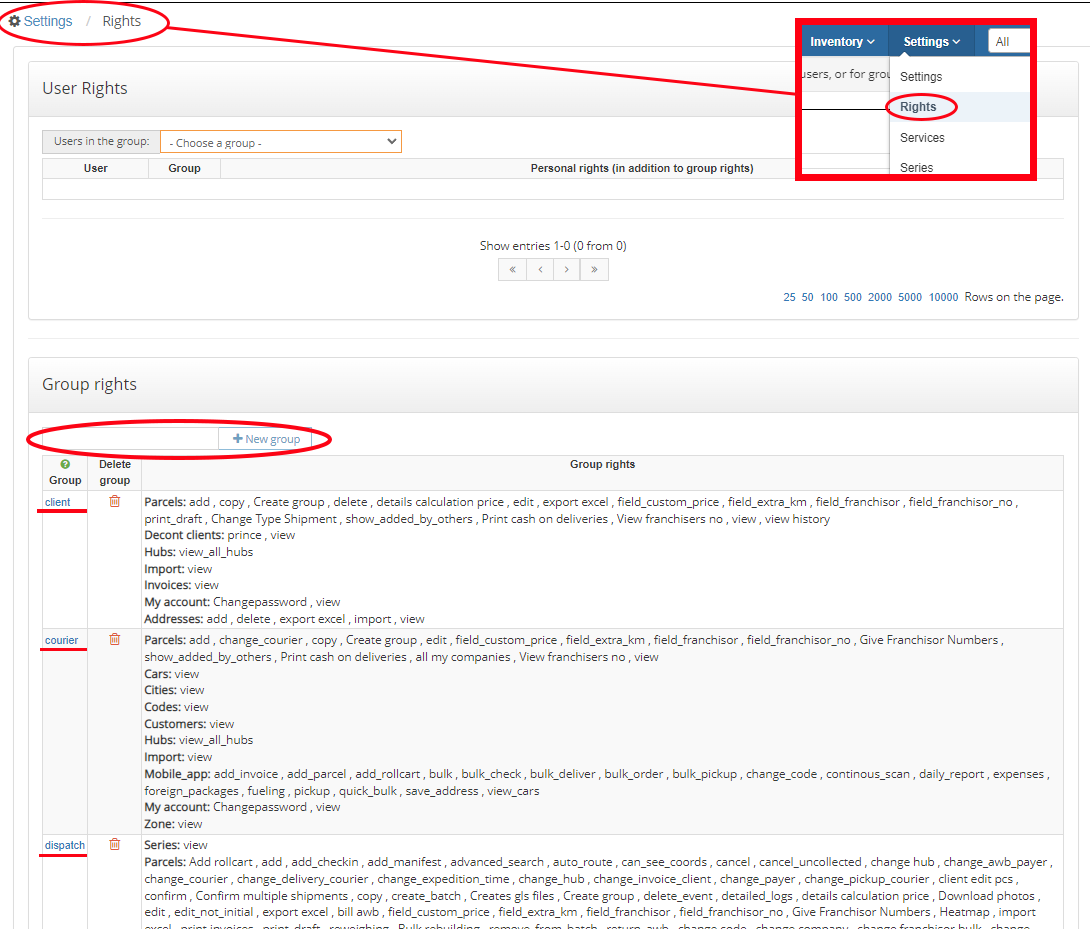
By default, the application has 3 types of groups, each with its specific rights. Normally, there would be little need to add a new group, but if you need to, you have to go to Settings / Rights. You can see there the 3 groups and the rights for each of them, and you can also add new groups from there, and set their specific rights.
